
ESP32-S3 board
The brain that runs your uploaded sketch.
ESP32-S3 Lab · Day 14 of 30
Today your own fingertip becomes the switch. One bare jumper on GPIO 14 is the touch pad, and the pin keeps charging it and measuring how much charge it holds. Your finger adds a little capacitance of its own, the reading jumps, and the sketch flips the LED — the same way a phone screen and an elevator button know a finger is there.
TSK-DAY14-TOUCH
Hand this to an agent so it can pull the lesson packet and coach you step by step.
01 First, know the pieces
Six things, and one of them doubles as the sensor. Tap Define on any part you haven't met — the answer opens as a field note you can read and dismiss without losing your place.
The brain that runs your uploaded sketch.

Spreads the pins into rows you can reach and label.
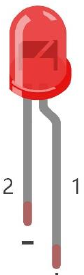
The lamp you'll flip with a tap — it only works one way round.
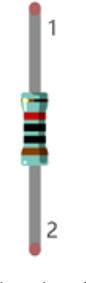
Sits in series with the LED to keep the current gentle.
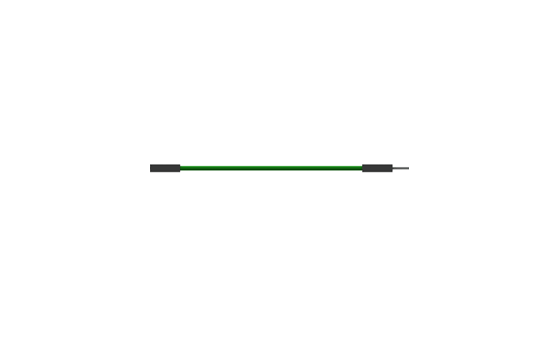
Two carry the LED circuit; the third sits alone on GPIO 14 with its free end bare — that tip is the touch pad.

Uploads the sketch to the board.
02 Make the physical circuit
The official Freenove diagram is your chart — schematic on top, the same circuit built on a breadboard below. Click it to enlarge. The touch pad is the simplest sensor of the whole course — a single jumper with a bare end.
Keep the touch wire to itself. The free end of the GPIO 14 jumper is for your skin only — keep it clear of 3.3V, 5V, and every other pin. Unplug USB before you move any wire.
03 One action at a time
This is the main path — you can finish the day without opening a single field note. Tap each step as you go to keep your place.
Seat the ESP32-S3 on the GPIO extension board and keep USB unplugged while you wire.
Place the LED so its long leg (+) is on the GPIO 21 side and its short leg (−) heads toward ground.
Put the 220 Ω resistor in series between GPIO 21 and the LED's long leg.
Push one end of a jumper into GPIO 14 and leave its other end free in the air — that bare metal tip is your touch pad.
Compare every wire to the chart, then plug in USB.
Open Sketch_09.1_TouchRead.ino first, upload it, and open Serial Monitor at 115200 — note the reading when the wire is alone and when you pinch its bare tip.
Open Sketch_09.2_TouchLamp.ino and upload it.
Tap the bare tip — the LED flips on. Tap again — it flips off.
04 Read just enough code
Two sketches today. Sketch_09.1_TouchRead.ino is the calibration tool — it prints the raw touch reading once a second so you can see your own numbers. The lamp itself is 9.2, shown below — two thresholds, a remembered flag, and a tiny helper that flips the LED.
#define PIN_LED     21
#define PRESS_VAL   200000	  //Set a threshold to judge touch
#define RELEASE_VAL 60000	    //Set a threshold to judge release

bool isProcessed = false;
void setup() {
  Serial.begin(115200);
  pinMode(PIN_LED, OUTPUT);
}
void loop() {
  if (touchRead(T14) > PRESS_VAL) {
    if (!isProcessed) {
      isProcessed = true;
      Serial.println("Touch detected! ");
      reverseGPIO(PIN_LED);
    }
  }
  if (touchRead(T14) < RELEASE_VAL) {
    if (isProcessed) {
      isProcessed = false;
      Serial.println("Released! ");
    }
  }
}

void reverseGPIO(int pin) {
  digitalWrite(pin, !digitalRead(pin));
}touchRead(T14)Measures the charge on touch pin T14, which is GPIO 14 — your fingertip drives this number far higher. touchRead(T14) > PRESS_VALOn this board a reading above 200000 counts as a touch; a reading below 60000 counts as a release. bool isProcessedRemembers that the current touch has already been handled, so one tap flips the lamp exactly once. digitalWrite(pin, !digitalRead(pin))Reads the LED pin's current state and writes the opposite — the flip itself. 05 Understand, don't memorise
Before the sketch, the one idea that makes a bare wire work as a sensor. The pin is always busy — charging the wire and measuring how much charge it holds, thousands of times a second. Your finger changes that measurement, and touchRead hands you the result as a plain number you can act on.
The pin pushes a small charge onto the bare wire again and again. The wire holds a little of it — that ability to hold charge is its capacitance.
Each cycle the pin measures how the charge builds up on the wire. With nothing near, that settles to a steady resting number.
Your body stores charge too. A fingertip near the wire adds its own capacitance, so the wire holds more and the measurement moves.
touchRead(T14) returns that measurement as a number. On this board it climbs far past its resting value the instant you touch.
your finger's capacitance lifts the reading past 200000 (press); releasing lets it fall below 60000 (release)
Nothing presses or closes here. The pin senses the change in its own electric field as your finger comes near, so a bare wire — even one behind a panel or a sheet of glass — does the whole job. This is the same sensing behind phone screens and elevator buttons.
The resting reading and the touched reading are two separated levels, and a threshold is any line you draw between them — above it means touched, below it means clear. The sketch draws two lines, a high one (PRESS_VAL) to call a press and a lower one (RELEASE_VAL) to call release, so a reading wavering near a single line can't flip the lamp back and forth.
Idle, the pin reads in the tens of thousands; a firm touch climbs past 200000. Older ESP32 chips reported touch as a drop toward zero, and some reference text still describes that — on your S3, trust the thresholds in the sketch and the numbers you read yourself.
06 Know it worked
The Serial Monitor is your calibration tool today — the proof is the LED answering your fingertip.
This lamp latches — the LED holds its state between taps, with your fingertip doing the whole job of a button.
07 Make the idea yours
Same working circuit, two numbers to make your own. The stock thresholds fit most hands; yours deserve a proper fit, drawn from readings you take yourself. It sits inside today's 25 minutes.
Upload Sketch_09.1_TouchRead.ino — it prints the raw touchRead value once a second. Watch the Serial Monitor and write down two readings- the wire alone, and your fingertip pinching the bare tip. They sit far apart. Set PRESS_VAL a little below your touched number and RELEASE_VAL a little above your idle number — you're drawing your own line between the two — then re-upload the lamp.
Raise PRESS_VAL step by step until a light brush does nothing and only a firm, deliberate grip flips the lamp. You've just designed how the switch should feel.
08 Learn it with a hand on the tiller
Every lesson ships with a code and a machine-readable packet, so an agent can guide you with full context.
TSK-DAY14-TOUCH
How the agent should behave: guide one physical connection at a time and wait for confirmation, and make sure the learner leaves understanding the mechanism — the pin charges the bare wire and measures its capacitance, a fingertip adds more, and a threshold they pick from their own readings turns that into a touch. Always check wiring, board, port, and USB before changing code.
Keep your place
Mark it complete — it shows on your course map, and your place is saved on this device.